Difference between revisions of "Keymapper Advanced"
| Line 72: | Line 72: | ||
When modifying units, always remember to click SAVE. | When modifying units, always remember to click SAVE. | ||
==cfml File== | ==cfml File== | ||
Revision as of 06:27, 23 July 2023
Basics
The keymapper is where you adjust the Keypress on how to control the various game units in WWII Online.
You can access the keymapper both before and after spawning into the game. In the UI under Preferences/Keymapper and when in the game world by pressing P.
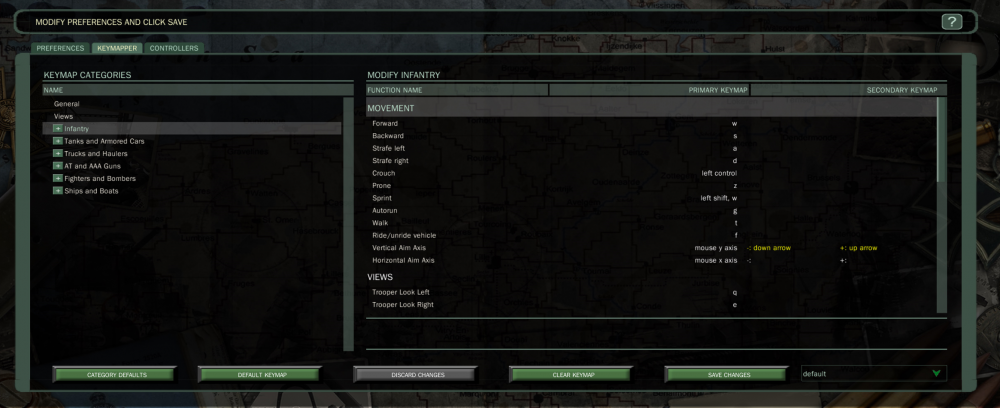
Either way you access it, the functionality is the same. The Keymapper is arranged under 8 Catorgories - General, Views, Infantry, Tanks and Armoured Cars, Trucks and Haulers, AT and AAA Guns, Fighters and Bombers, Ships and Boats.
Keymapper
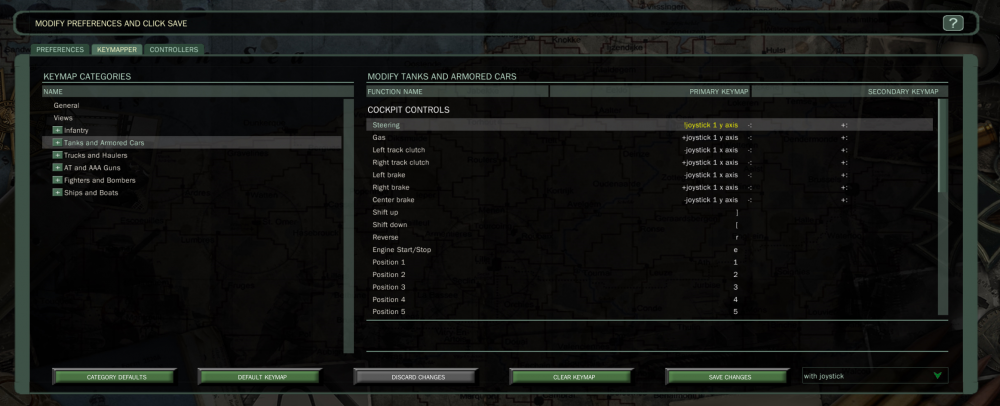
Creating and editing keyboard and axis bindings happens here. Select a category, then a function from the Keymap Categories pane then create or edit the binding in the Modify pane. Binding is as simple as selecting the Primary or Secondary Keymap that corresponds to the function you are binding, double click and enter the key or axis to bind. It's that simple. You can also bind multiple key presses to a single function.
Keymapper Controls: There are five buttons along the bottom of the Keymapper that allow you to manage your bindings and categories very simply.
- Category Defaults: Set all Keymaps in the current category back to the game defaults. Use this button when wishing to “start from scratch” or reclaim the defaults in that category.
- Default Keymap: Set currently selected keymap back to the game default. Use this button if you want to return a single keymap to its original binding.
- Discard Changes: Discard any changes that have occured since the last save.
- Clear Keymap: Clears the currently select keymap.
- Save Changes: Saves any changes since the last save. Note that you can still set any binding or category back to its defaults even after you save if needed.
When you save a changed keymap, this will be stored within a file called cfml at the current locations:
- C:\Users\<username>\My Documents\WWIIOnline\cfml [Windows]
- <users>\Documents\WWIIOnline\cfml [Mac]
Note for Windows: The My Documents folder under Windows OS can be relocated, so the exact location may not be as indicated. However the available "My Documents" shortcut will always point to where ever it is located.
Making Changes
The basic keymapper is fairly straight forward.
The first column is the fuction and what the keypress will do.
The second column is the primary keypress and axis are set up.
The third column is where you can set secondary keys for a function. If the function is an axis, you will see it allows for using + and - key, this allows you to set what would normally be a joystick or mouse axis function to a pair of keys or buttons.
For example the Vertical Aim Axis can be used with the up/down arrows.
Catergories
The game comes with every unit mapped to a standard default key layout which is shown in the following page.
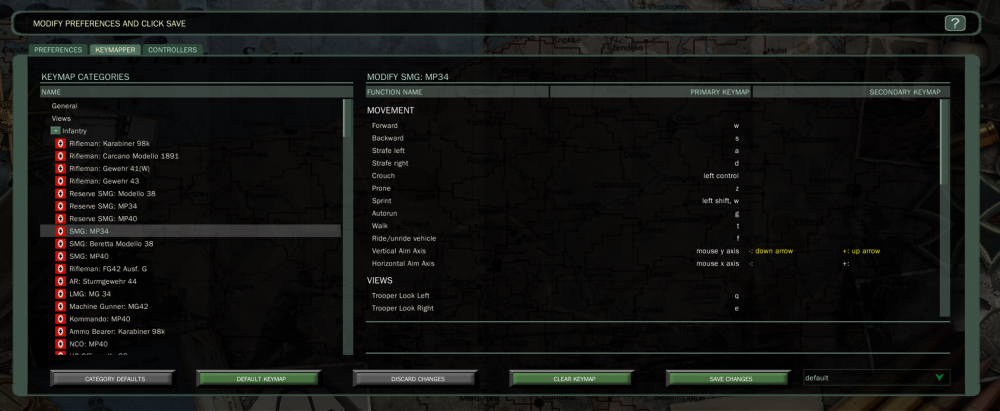
You can modify individually how every unit in the game is controlled or you can modify the entire category.
Simple Change
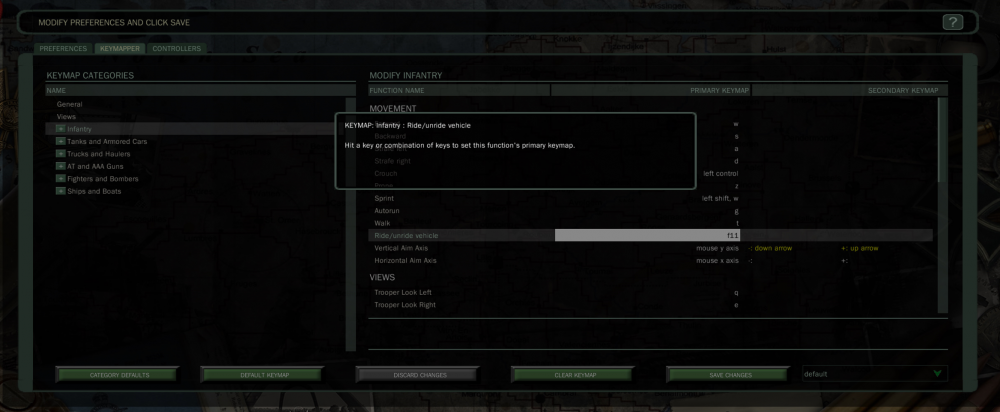
To make a change select the individual unit or the category, press the Primary or Secondary keymap you wish to change it will go white, click again and a dialogue box will pop up detailing what changes can be made.
In the example below you can see I am changing the Ride/unride vehicle keypress to F11.
Inverting Axis
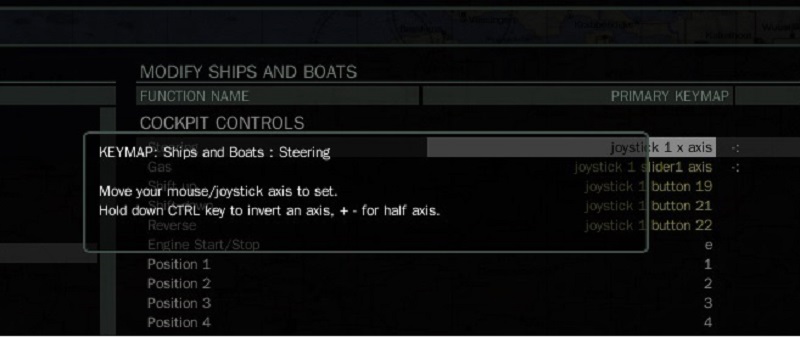
Now when you are mapping an Axis, the dialogue box will explain how to invert the axis, and how to half the axis.
As the picture shows, you hold control to reverse the axis you are moving, this will now show with a Exclamation Mark.
If you want to half the axis, for example throttle/brake.
Hold + for the game to only use forward/right motion of the axis you move for that control.
When modifying units, always remember to click SAVE.
cfml File
After you have gotten the basics down and played with for a while you may find that you wish that the game allowed for more control over the functions.
This is where the hidden capabilities of the games input handling really shines.
Perhaps you use a keyboard, and you wish that when driving a truck, you had more control than just full throttle or full brakes.
With no other tool than a simple text editor such as WordPad or Textedit on a mac. Windows notepad is not the best option as it does not understand the linebreaks. You can edit the control files you have created in the keymapper and give yourself virtually unlimited control possibilities
By default the game has no control files created, it uses the built in templates.
To make the game create files, you need to make a simple change, select the category in the keymapper that you wish to add further fuctionality to.
Make your changes then click save.
The files will be created in
- C:\Users\<username>\My Documents\WWIIOnline\cfml [Windows]
- <users>\Documents\WWIIOnline\cfml [Mac]
Note for Windows: The My Documents folder under Windows OS can be relocated, so the exact location may not be as indicated. However the available "My Documents" shortcut will always point to where ever it is located.
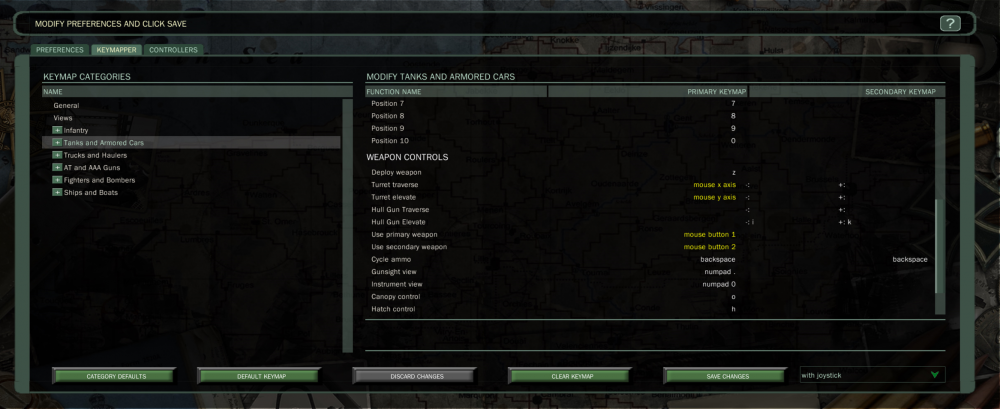
Here you can see I have mapped the Turret Traverse, Turret Elevate, Use Primary Weapon and Use Secondary Weapon to the Mouse.
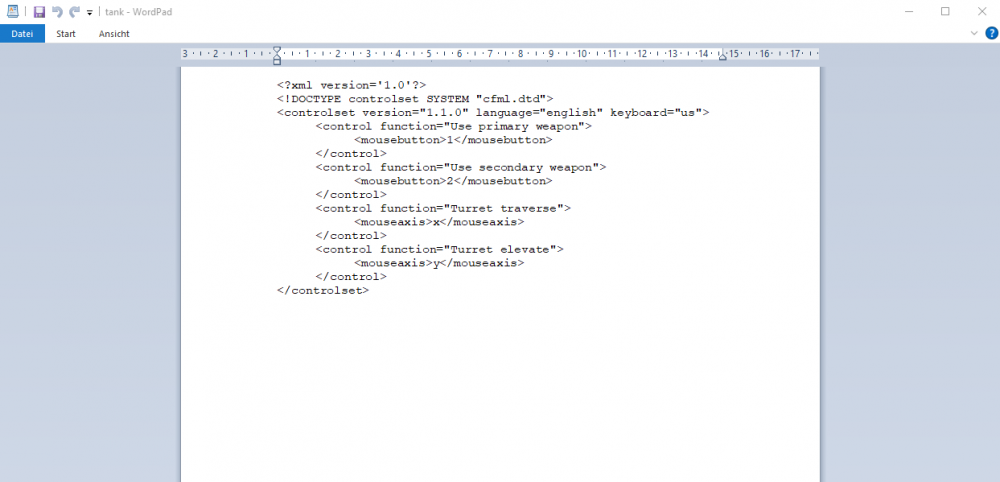
Now you have a file created in your cfml folder called tanks, opening that with a text editor will show the following:
Here you can see the changes made and below is a single function.
<control function="Use primary weapon">
<mousebutton>1</mousebutton>
</control>
It has the Function Name with the associated mousebutton, in this case Mouse Button 1. Your editing will only take place between "<control function" and the "/control" tag.
ALWAYS make a copy of the file before you edit, so if you make a mistake you can simply restore the copy.
Keyabsolute
Keyabsolute gives an absolute value for a given input, on press it gives it max value, on release it returns to neutral.
Neutral (CENTER) is 50.00, Minimum (LEFT or DOWN) is 0.00, Maximum (RIGHT or UP) is 100.00. Think of it as if it were a joystick axis in the center is 50, full left is 100 full right is 0.
The smallest amount of deflection the game will except in a keyabsolute is 6% anything less, the game doesn't consider it movement. This matters because some times you want a key, say for aiming a tank, with very slow fine movement, say for aiming at a far away target.
So setting Left Arrow to 44 and Right Arrow to 56 would let you move the turret really really slowly left or right and doing the same for Up and Down Arrow would do the same for up and down.
So for the turret of a tank the traverse would be fast using the Mouse and slow ussing the Arrows for fine tuning. If its to0 slow then you can change the values in 6s.
<control function="Turret traverse">
<keyabsolute value="44.00" onrelease="50.00">
<key>left arrow</key>
</keyabsolute>
<keyabsolute value="56.00" onrelease="50.00" index="10">
<key>right arrow</key>
</keyabsolute>
</control>
<control function="Turret elevate">
<keyabsolute value="44.00" onrelease="50.00">
<key>down arrow</key>
</keyabsolute>
<keyabsolute value="56.00" onrelease="50.00" index="10">
<key>up arrow</key>
</keyabsolute>
</control>
Keydelta per Second
A keydelta has no return, when you release it, it continues to do what ever it is that you told it to do.
You either have to press the opposite key, or simply touch your main control key, which would over ride the keydelta, keydelta's are always over ridden by any other control moving the same thing.
There are some very useful things you can do with them.
Cruise control for a throttle, variable flap settings on an airplane, automatic pushing of an AA or Anti Tank gun or anything you would otherwise have to keep holding the button down for.
<keydelta value="1.00" per="sec">
<key>A</key>
</keydelta>
<keydelta value="-1.00" per="sec">
<key>D</key>
</keydelta>
Per Sec means per second. What ever you are moving will increase in increments of 1% per second the button is held and will remain at that position when the button is released.
If you mapped a trucks throttle like this, holding the key down for 10 seconds would give you 10% throttle and it would remain on when released.
If you mapped the movement of an AT or AA gun, then it would begin to walk forward at 10% speed and keep walking, until you stopped it by using the other key to reduce speed to a stop, OR you moved your main movement control which would over ride the keydelta
EXAMPLE AT Gun cruise control W and S normal moving T and G cruisecontrol.
<control function="AT Gun Move">
<keyabsolute value="0.00" onrelease="50.00">
<key>W</key>
</keyabsolute>
<keydelta value="1.00" per="sec">
<key>T</key>
</keydelta>
<keyabsolute value="100.00" onrelease="50.00" index="10">
<key>S</key>
</keyabsolute>
<keydelta value="1.00" per="sec">
<key>G</key>
</keydelta>
</control>
Keydelta per Keypress
As you have already probably guessed, instead of holding it down, it moves to the designated percent per key press.
Otherwise it functions the same way as the per second, you simply tap it to increment the designated percentage
For example
<keydelta value="10.00" per "keypress"> would move the throttle or control up 10% each time you pressed the key, rather than holding it. This only works for things that have variable speeds or positions, you can not use it for infantry for example, they have 3 fixed speeds- walk, jog, sprint toggled by the appropriate keys.
Incremental Flaps
Here is a simple code that will give you incrental Flaps. This should be added to your Air File.
<control function="Flap control">
<keydelta value="20.00" per="keypress">
<joybutton stick="1">3</joybutton>
</keydelta>
<keydelta value="-20.00" per="keypress" index="10">
<joybutton stick="1">4</joybutton>
</keydelta>
</control>
Here are Screenshot showing flaps up and flaps at 40% using the code above.

