Difference between revisions of "AK 1917 Freighter"
| (6 intermediate revisions by the same user not shown) | |||
| Line 12: | Line 12: | ||
| '''Armament''' || 4 x 20 mm Anti-Aircraft Batteries | | '''Armament''' || 4 x 20 mm Anti-Aircraft Batteries | ||
|- style="background: white;" | |- style="background: white;" | ||
| '''Crew''' || 8 | | '''Crew''' || 8 Total (Position: Role)<br>1: Helmsman<br>2: Port Lookout<br>3: Crane Operator<br>4: Backup Helmsman<br>5: Starboard Lookout<br>6: Forward Gunner<br>7: Rear Gunner<br>8: Backup Helmsman | ||
|- style="background:#f0f0f0;" | |- style="background:#f0f0f0;" | ||
| '''Weight''' || 5,243 | | '''Weight''' || 5,243 Tons | ||
|- style="background:#f0f0f0;" | |- style="background:#f0f0f0;" | ||
| '''Top Speed''' || 15 | | '''Top Speed''' || 15 Knots | ||
|} | |} | ||
| Line 34: | Line 34: | ||
A quiet stretch of beach away from the immediate battle front is the best spot to unload your cargo. That way you have a better chance of not being spotted by enemy aircraft and you give the enemy less chance to sink or destroy you and the equipment and troops you are reinforcing. A lot depends on how calculating and clever you are as a captain and how well organized you are in forming a strong team around you to get the job done. | A quiet stretch of beach away from the immediate battle front is the best spot to unload your cargo. That way you have a better chance of not being spotted by enemy aircraft and you give the enemy less chance to sink or destroy you and the equipment and troops you are reinforcing. A lot depends on how calculating and clever you are as a captain and how well organized you are in forming a strong team around you to get the job done. | ||
<center>[[File:Nv_fr_ak_1917.jpg| | <center>[[File:Nv_fr_ak_1917.jpg|600px]] [[File:Nv_de_ak_1917.jpg|600px]]</center> | ||
=Crew Insights= | =Crew Insights= | ||
| Line 45: | Line 41: | ||
Here is a detailed explanation on the type of crew and the Armament it controls. | Here is a detailed explanation on the type of crew and the Armament it controls. | ||
*Position 1. Helmsman - Not much explanation required, from here you can turn the Engine On/Off and navigate the Boat. | *Position 1. Helmsman - Not much explanation required, from here you can turn the Engine On/Off and navigate the Boat. | ||
*Position 2. Lookout - | *Position 2. Port Lookout - Stood on the Left side of the Ship (Port) this Crew is Equipped with Binoculars. | ||
*Position 3. | *Position 3. Crane Operator - Used to board Armour and Trucks into the hull of the Ship. Also Controls Lifeboats so Infantry can board. | ||
*Position 4. | *Position 4. Backup Helmsman - Back up to Position 1. | ||
*Position 5. | *Position 5. Starboard Lookout - Stood on the Right side side of the Ship (Starboard) this Crew is Equipped with Binoculars. | ||
*Position 6. | *Position 6. Forward Gunner - 2x 20mm Anti-Air Guns. | ||
*Position 7. Rear | *Position 7. Rear Gunner - 2x 20mm Anti-Air Guns. | ||
*Position 8. | *Position 8. Backup Helmsman - Back up to Position 1. | ||
[[Category:Naval]] | [[Category:Naval]] | ||
Latest revision as of 04:42, 5 February 2024
History
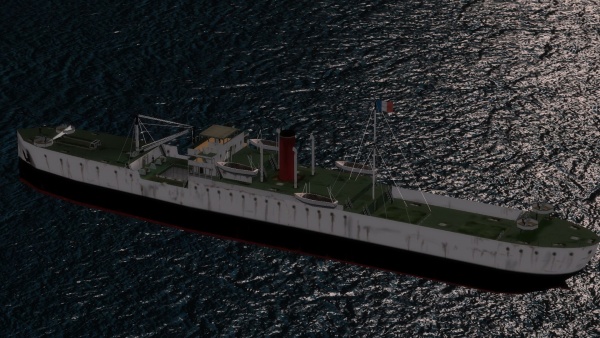
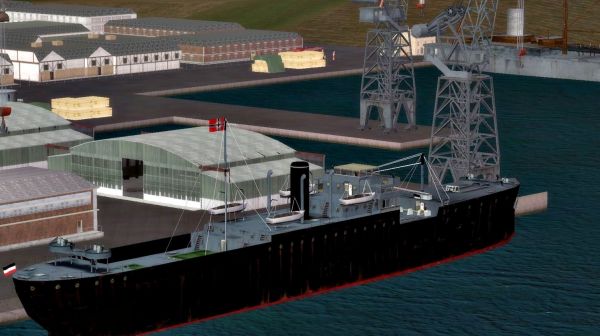
The A class 1917 "Steamer" was originally a British design launched in 1917, that after WWI became the generic blueprint for tramp steamers the world over, serving in every port under every maritime flag imaginable. It served as a lightly armed freighter during both world wars. Its role in Battleground Europe is to provide the means to transport vehicles and troops across coastal waters for amphibious assaults where tanks and other heavy weapons are otherwise not available for combat.
It is equipped with a crane and the ability to transport 4 heavy vehicles such as tanks, once loaded. Troops can also be transported at the same time, and it is armed with four 20mm anti-aircraft batteries slaved together in pairs which 2 players can multicrew as anti-aircraft gunners, controlling all 4 guns.
It was not armored or otherwise given to any protective measures against anti-shipping attack, apart from the light AA FlaK batteries that it received as token protective weaponry. Game Play
Players wishing to provide a much needed though seldom understood role within the campaign world of Battleground Europe can find themselves a highly useful niche as boat captains providing amphibious transport for the fight to occupy the important island territories of the Zeeland Islands early on, and often late in a campaign there is a tremendous effort expended by both sides over the ownership of the English Channel ports and the ability they provide to invade in either direction across that expanse of channel ocean.
Zeeland Island territories do not have heavy equipment like tanks unless they are shipped there on transports during the assault, or in the case of the defending side, during defensive operations. As getting a transport ship into a frontline combat region is difficult due to enemy attack boats like destroyers and gunboats, not to mention enemy air power which is highly capable of anti-shipping roles, good transport captains are worth their weight in gold, or more likely, their weight in guns.
The good (read: patient and calculating) transport captain will make sure he has some air cover in the form of fighters shadowing him overhead. In addition to this it would serve him well to have some destroyer and even gunboat escort to better assist the run into the hot zone. Multicrewing his boat will give him twice the ability on the AA FlaK gun batteries, when shooting down enemy bombers and attack aircraft sent to sink him and the troops and tanks he carries.
A quiet stretch of beach away from the immediate battle front is the best spot to unload your cargo. That way you have a better chance of not being spotted by enemy aircraft and you give the enemy less chance to sink or destroy you and the equipment and troops you are reinforcing. A lot depends on how calculating and clever you are as a captain and how well organized you are in forming a strong team around you to get the job done.


Crew Insights
Here is a detailed explanation on the type of crew and the Armament it controls.
- Position 1. Helmsman - Not much explanation required, from here you can turn the Engine On/Off and navigate the Boat.
- Position 2. Port Lookout - Stood on the Left side of the Ship (Port) this Crew is Equipped with Binoculars.
- Position 3. Crane Operator - Used to board Armour and Trucks into the hull of the Ship. Also Controls Lifeboats so Infantry can board.
- Position 4. Backup Helmsman - Back up to Position 1.
- Position 5. Starboard Lookout - Stood on the Right side side of the Ship (Starboard) this Crew is Equipped with Binoculars.
- Position 6. Forward Gunner - 2x 20mm Anti-Air Guns.
- Position 7. Rear Gunner - 2x 20mm Anti-Air Guns.
- Position 8. Backup Helmsman - Back up to Position 1.
