Quick Start Guide
Quick Start Guide
The following quick start guide is not all inclusive, however it will help you hit the ground running.
Peripherals
Several types of peripheral devices can improve your enjoyment of the game.
- Joystick: Any brand name company (Saitek, Logitech, Microsoft, CH), 3 axis with throttle.
- Rudder Pedals: Optional, but well worth it if you fly a lot.
- Audio output/Input: A top quality headset or 5.1 sound system is highly recommended. A boom mic is recommended since voice comms are now integrated into the WWIIOL client.
- Other supported devices: TrackIR ™, Matrox TripleHead2Go ™.
Tablets
While the game is not designed for tablets, and there is NO official support for any tablet devices, with a mouse it is playable on:
Microsoft Surface 3-Pro
Processor I5
OS Windows 10.
It may be playable on other modern tablets as well.
Download and Installation
The most recent game version can be downloaded on our Downloads Page.
Run the installer and follow the steps provided (instructions are for PC 64 and MAC). You will also be asked to choose your preferred Game Settings.
Account Creation
To join hundreds of others playing WWII Online, you must have an account to be able to access the game server. You can create an account here Account Creation and selecting "Sign up Now!"
More details regarding subscription options can be found here:Subscription Information
Practice Offline
After installing the game, it is beneficial to select the free Practice Offline option first. This option will allow you to familiarise yourself with both the game and the combat units, as well as confirming that your system meets the minimum system requirements. Use the Practice Offline option located in your Start Menu to access offline training (Mac users: use the Practice Offline button). Select any unit and then click the Enter World button. You will spawn at a training base with practice ranges and targets for infantry, vehicles and aircraft.
Campaign Server
Select Play Online from the Start Menu to open the WWII Online launcher, Agree to the Terms of Service, enter your account username and password, then click Login. Select Campaign and click Play.
Training Server
Select Play Online from the Start Menu to open the WWII Online launcher, Agree to the Terms of Service, enter your account username and password, then click Login. Select Training and click Play.
Mac
The Mac version of the game does not use the same launcher as PC. Enter your login information into the fields, then click "Play Online!"
Gameplay Basics
Tutorials
Choose which country you wish to perform training with (you only have to complete the training once) and click Start Training. These tutorials will teach you how to operate in the game, and additional tutorials will become available as you proceed. Click the Back button when complete. You can continue training at any time by selecting the Training tab. There is no requirement to complete the training tutorials.
Quick Start Video
This video shows basic game play mechanics such as how to use the keymappers, basic controls, how to operate vehicles, etc.
Preparing to Enter the Game World
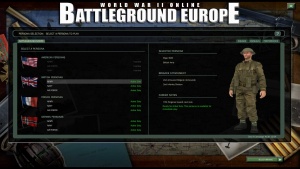
Select your Persona at the Persona Selection Screen. You can choose to fight for the Axis Forces of Germany and Italy, or defend Europe with the Allied Forces of the United Kingdom, France and the United States (available in later tiers). Every country, except the United States, has distinct branches consisting of Army, Naval and Air Force units, but choose carefully, you’ll be locked to one side for 15 minutes (this may change depending on side balancing) before you can change between the Allies and Axis.
Joining a Squad
You may be presented with a Squad Recruitment menu when you log in for the first time, and this option will show you some of the squads on your chosen side that are currently recruiting, and linking up with one is a great way to get some real combat experience under your belt. Being in a squad is not a gameplay requirement but is most certainly advisable; Groups often survive far longer than a lone wolf.
Brigade or Garrison Selection
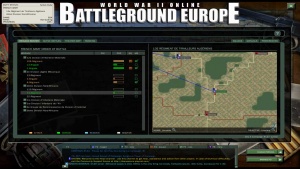
Select a Brigade or Garrison from the Brigade Roster tab or by right-clicking on the town on the mini-map. There is a population meter displayed for each brigade, and the higher population levels will often indicate ferocious combat in that area of operations. A Brigade coloured orange indicates an offensive, while grey and green indicate inactivity or defensive operations. Bear this in mind before spawning in as life expectancy is extremely short in the largest battles.
Mission Selection
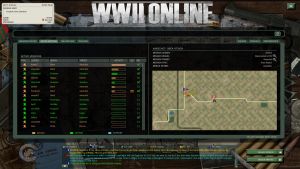
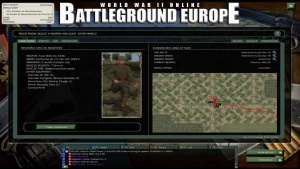
Select a Mission from the list on the Active Battles tab. Any mission with a mobile spawn icon (indicated by a green tick) will get you closest to the action. You can also review the Theater Map and information about the Brigade in the Communications tab. Select a Mission and click Mission Briefing. You can also create missions if you have the required rank.
The Ready Room tab contains all information that relates to the selection of units, spawning, and After Action Reviews.
Choosing your Unit
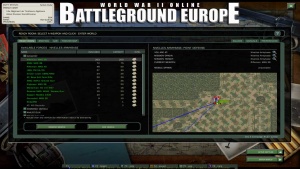
To select a unit either double click on the unit you want to play as or click Reserve Weapon. Not all of the combat units will be available to you on your first spawn in, and you may find yourself starting as a humble rifleman. However, more units will become available as you gain rank and experience in combat. To maximise your experience gain, link up with other players and squads and help with taking and holding buildings such as CPs and Army Bases. Every infantryman you kill will also help with gaining rank.
Once you have selected a unit, you will be able to check the soldier's equipment and characteristics. If you change your mind, click Cancel Reservation and you will return to the unit selection screen.
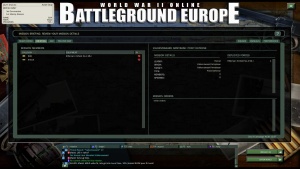
The Briefing tab will list other players who are on your chosen mission and will also tell you what unit they are playing as.
The AAR Tab shows mission results, which includes kills, points earned, and - if Killed in Action - who killed you.
When ready, click Enter World to join the fight.
Enter the Game World
If you have completed the training tutorials, you should be ready to fight.
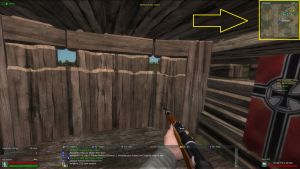
Minimap
Once you spawn in look at the minimap in the upper right corner for a green arrow pointing to your Mission Target. The number pad – (minus) and + (plus) keys will zoom the minimap in or out.
The Head's Up Display (HUD)
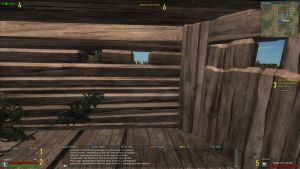
While you are in the game world there are head’s-up-display (“HUD”) elements around your screen that provide information about your combat status. You can turn them on or off with the Y key. These are all explained in the Training tutorials but are mostly self-explanatory, such as: Weapon and Ammunition, Health, and Stamina.
- Shows your weapon and ammo counter.
- Yellow truck indicates mobile spawn. Red bar indicates health. Green indicates your stamina.
- Shows game info, connectivity, FPS, etc (num lock key).
- Shows your rank and game name.
- Shows the town you are near and LAT/LON, or if you are capturing / facility.
- Mission leader orders.
Communications
Basic functionality is simple: press Enter to open the buffer, type a message or Text Commands and press Enter again to send a message or execute command. There are six separate radios within the chat tool that allow you to customize your communications with various groups of players. Each of the six radios is bound to the function keys F1 through F6. You can use the Enter key to transmit on the default radio (usually this is local to the players near you), or simply press the corresponding function keys to open the buffer for transmitting on that specific radio or sets of radios.
Tuning the Radios
(Note: if you are spawned into the game world, hold the Right Alt key to bring up the cursor.) You can manually tune any of the six radios by clicking on the channel tuning elements along the top of the display. Clicking here will expand a tuning menu of predetermined channels and a custom tuning field. Clicking any of these menu items will automatically tune that radio to the selected channel. The Clear button will clear the tuning, and the Custom button allows for entering a soldier’s game name for private communications.
