Churchill
Churchill Mk III
History
| |
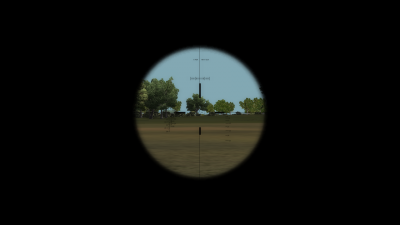
| Main Gun Optics | |
| Specifications | |
| Designation | No.39 Mk IIS |
| Magnification | x1.9 |
| Field of View | 21° |
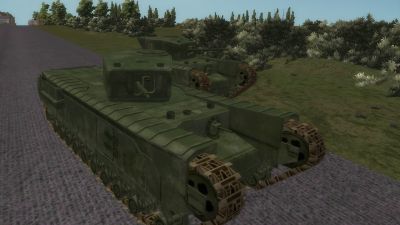
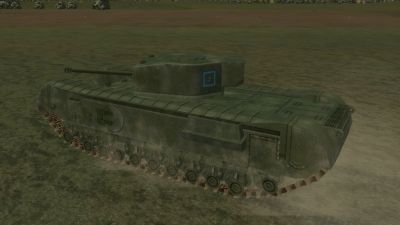
The Churchill was one of the most widely used British tanks of the war with dozens of variants employed in all theaters. Heavy armor virtually the equal of the German Tiger tank in many respects, coupled with a low silhouette made it a popular tank with its crews due to its survivability under fire. But its slow road speed and 6 pounder gun were key weaknesses. In its defence, it was one of the most unbeatable tanks of the war off road, due to its ability to climb steep grades.
Game Play
The Churchill should be played like a bigger, badder, better Matilda II. You should remain cautious about air attacks because while your heavy armour all around will give you considerable security when you encounter enemy tanks, they will very likely call in heavy air support to eliminate you. This is something you should count on all the time; and if you are wrong, then all the better for you when you RTB.
The main threats you need to consider are the ubiquitous 88 mm FlaK gun, and the Tiger tank which mounts virtually the same weapon in an extremely heavily armoured turret. Even though the Tiger usually enters the game world after the Churchill Ill does, the long 75 mm guns of the Panzer IV G and StuG Ill G can still put a hurt on the Churchill under the right circumstances. Your lack of speed will make flanking manoeuvre tactics difficult. It will always serve you better to use your low profile to act as an extremely nasty ambush tank; your armour allowing you to retreat or even advance under what could be very heavy enemy fire once they know where you are hiding. Try to keep a berm or terrain elevation between your tank and enemy fire as your tracks are as vulnerable as any tracked vehicles.
The Churchill Ill will be a prime target for enemy forces be they tanks, bombers, AT guns or even anti-tank infantry. You must always assume you are the number one enemy target. The 6 pdr gun is a good AT gun, firing a high velocity if somewhat light AP round.
The Crusader Ill is armed with exactly the same gun, but, being lighter and faster, can make a good running partner doing the flanking work while the Churchill slugs it out at in the more direct approach. The Churchill has good armor but its opponents have great guns in their 75's, frontal slugfests are best left to the dead tankers that they will soon become.
Churchill Mk V close Support
History
| |
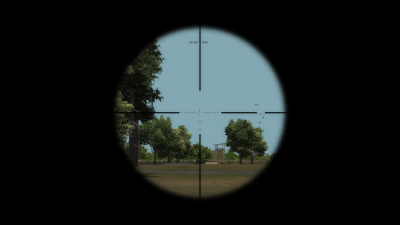
| Main Gun Optics | |
| Specifications | |
| Designation | No.48 x 3 L Mk |
| Magnification | x3 |
| Field of View | 21° |
The Churchill was one of the most widely used British tanks of the war with dozens of variants employed in all theatres. Its heavy armour coupled with a low silhouette made it popular tank with its crews due to its survivability under fire. Exchanging the standard 6pounder main gun for a QF 95 mm howitzer, The Churchill Mk V (CS) was a dedicated infantry support tank with a heavy HE punch and very effective shot-range anti-tank capability. The Close Support Churchill was a command tank with but two vehicles allotted to each Squadron HQ, these being called in whenever the infantry required extra firepower against fortifications, fortified houses and such like.
Game Play
The Churchill CS, as with all CS tanks, is for supporting infantry, and to a lesser extent other tanks. In this role it is generally vital to keep moving at all times, preferably on road for accurate gunnery, and to ensure your lead tank does the same, at least in 2nd gear. The 95 mm low velocity howitzer has a pronounced shell trajectory that allows you to lob HE, smoke and HEAT shells with great effect into places where ordinary high-velocity guns cannot reach. Your ammunition load out is anyway quite small, so stay close to trucks and other resupply assets. Using the 95mm howitzer, the Churchill CS can lay useful laying smoke screens, demolishing cp's with HE, or filling a building with smoke. It is important to check with the infantry that they want either of the preceding, and are not in it when you do so. Do not lay screens of smoke in front of FMS's unless you first see friendly troops under effective fire, and are confident the enemy knows the position of your fms. Do not lay smoke screens continuously, as your smoke will obscure ei Combat Engineers coming out to hit the FMS!
You do need to think well ahead with this vehicle, and resist the urge to drive it into an AB "early". You need to pick your moment in the battle where the town has both been contested for a good while, and most of the panzers destroyed. Go in too early and you'll come decidedly "second". Pick your routes, and be certain of what you're going to do, and where to traverse the turret before you go in. Trusting to any sense of invulnerability does not work, you'll be tracked and finished off faster than you can "knife". The other good role for a Churchill CS is to position at one end of an E/W or N/S rd, and creep in second gear, always on the move, cutting that road so enemy troops cannot easily cross it, employing both HE and MG, turning 180 degrees on reaching the end of the road. You may need to retire once or twice to an FMS to re-arm. When in town, NEVER attempt to change from forward to reverse gears, and ALWAYS assume there are EI sappers and Panzersherks about. The short period when you're stationary will be enough for the sapper to place his charge and blow you to Perdition, or track you, which amounts to the same thing 1 minute later!
This is a fun tank, but it is NOT for beginners, it's very effective, but it take a good deal of experience to get the most out of it and survive. Use the HE to blow building and generally case chaos. Unlike the Matilda CS the Churchill CS is equipped with a small amount of HEAT rounds, so It is capable of destroying most German armour you will encounter but be aware you have so few issued that are only to be used in emergencies. Remember, this is a support tank therefore this is a teamwork machine first and foremost. if you use it thoughtlessly, or as aggressively as you might use the regular Churchill tanks, you will generally come unstuck.
Churchill Mk VII
History
| |
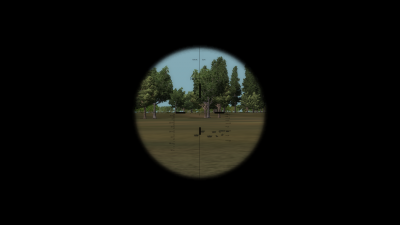
| Main Gun Optics | |
| Specifications | |
| Designation | No.50 x 3 L Mk I |
| Magnification | x3 |
| Field of View | 13° |
It had already been determined as early as the mid/late period of 1939 that a replacement for the Matilda II would be needed ... the crushing loss of the BEF in 1940 and almost all the equipment, tanks and guns then in British service …led to the crash development of the Churchill as a heavy tank to stem the anticipated German invasion.
The rushed development would result in a tank with numerous reliability problems, nevertheless the Churchill went on to become one of the most widely used British tanks of the war with dozens of variants employed in all theaters. Very heavy armor and a low silhouette made it a popular tank with its crews due to its survivability under fire, but its slow road speed and lackluster gun, when compared directly to German tank guns and the armor they were employing by this time … always left it as wanting something more in terms of how it might ideally have been. In its defense it was one of the most unbeatable tanks of the war off road, being highly mobile in tight going or when climbing steep grades.
Game Play
The Churchill should be played like a bigger, badder, better Matilda II: you should remain cautious about air attack because while your heavy armor all around will give you considerable security and time when you encounter enemy tanks (if you stay anywhere very long in such a feared tank) the enemy tankers will very likely have called in the heavy air support of their bombers to eliminate you. This is something you can count on all the time, and if you are wrong, then all the better for you when you RTB.
The main threats you need to consider are the ubiquitous and ever present 88mm FlaK gun, and the Tiger tank which mounts virtually the same weapon in an extremely heavily armored turret. Your lack of speed will make maneuver tactics to flank enemy armor difficult, and it will always serve you better to use your low profile to serve you as an extremely nasty ambush tank; your armor allowing you to retreat or even advance under what could be very heavy enemy fire once they know where you are hiding. Try to keep a berm or terrain elevation between your tank and enemy fire as your tracks are as vulnerable as any other tracked vehicles tracks are, and the weak point of any tank no matter what kind it is.
The Churchill VII, almost immune from most if not all quarters of attack will be a prime target for enemy forces; be they tanks, bombers, AT guns or even anti-tank infantry. You must always assume you are the number one unit in the British armored forces that the enemy wants to see killed in battle. The 75mm gun is a low velocity gun, firing the same 75mm rounds as the Sherman. But it is in actuality a QF6pdr gun bored out to accept the 75mm ammunition of the Sherman. It performs slightly better than the Sherman M3 does due to a slightly longer barrel granting it a small increase in muzzle velocity. This improvement over the M3 is only very slight, and it is no match for the high velocity Axis 75mm guns it will be facing. The Crusader III 57mm is actually better against enemy armor.
Churchill Mk VIII close Support
History

| |
| Main Gun Optics | |
| Specifications | |
| Designation | No.48 x 3 L Mk |
| Magnification | x3 |
| Field of View | 21° |
The Churchill was one of the most widely used British tanks of the war with dozens of variants employed in all theatres. Its heavy armour coupled with a low silhouette made it popular tank with its crews due to its survivability under fire. The Churchill Mk VIII Close Support infantry tank is identical to the Mk VII in all respects except for the 95 mm lowvelocity howitzer, the same weapon as is mounted in the Mk V. Sacrificing some side armor protection for 152 mm of frontal armor, this beast of a tank is as survivable as it gets.
Game Play
The Churchill CS, as with all CS tanks, is for supporting infantry, and to a lesser extent other tanks. In this role it is generally vital to keep moving at all times, preferably on road for accurate gunnery, and to ensure your lead tank does the same, at least in 2nd gear. The 95 mm low velocity howitzer has a pronounced shell trajectory that allows you to lob HE, smoke and HEAT shells with great effect into places where ordinary high-velocity guns cannot reach. Your ammunition load out is anyway quite small, so stay close to trucks and other resupply assets. Using the 95mm howitzer, the Churchill CS can lay useful laying smoke screens, demolishing cp's with HE, or filling a building with smoke. It is important to check with the infantry that they want either of the preceding, and are not in it when you do so. Do not lay screens of smoke in front of FMS's unless you first see friendly troops under effective fire, and are confident the enemy knows the position of your fms. Do not lay smoke screens continuously, as your smoke will obscure ei Combat Engineers coming out to hit the FMS!
You do need to think well ahead with this vehicle, and resist the urge to drive it into an AB "early". You need to pick your moment in the battle where the town has both been contested for a good while, and most of the panzers destroyed. Go in too early and you'll come decidedly "second". Pick your routes, and be certain of what you're going to do, and where to traverse the turret before you go in. Trusting to any sense of invulnerability does not work, you'll be tracked and finished off faster than you can "knife". The other good role for a Churchill CS is to position at one end of an E/W or N/S rd, and creep in second gear, always on the move, cutting that road so enemy troops cannot easily cross it, employing both HE and MG, turning 180 degrees on reaching the end of the road. You may need to retire once or twice to an FMS to re-arm. When in town, NEVER attempt to change from forward to reverse gears, and ALWAYS assume there are EI sappers and Panzersherks about. The short period when you're stationary will be enough for the sapper to place his charge and blow you to Perdition, or track you, which amounts to the same thing 1 minute later!
This is a fun tank, but it is NOT for beginners, it's very effective, but it take a good deal of experience to get the most out of it and survive. Use the HE to blow building and generally case chaos. Unlike the Matilda CS the Churchill CS is equipped with a small amount of HEAT rounds, so It is capable of destroying most German armour you will encounter but be aware you have so few issued that are only to be used in emergencies. Remember, this is a support tank therefore this is a teamwork machine first and foremost. if you use it thoughtlessly, or as aggressively as you might use the regular Churchill tanks, you will generally come unstuck.
